


How to use Behaviour-Driven Development (BDD) with C# and SpecFlow
Here is an introductory guide on how to use Behaviour-Driven Development (BDD) with C# and SpecFlow in a .NET application.


Behaviour-Driven Development (BDD) is a technique of agile software development to ensure that the requirements of the software to be developed are fulfilled. To achieve this a special syntax called Gherkin (see below) is used to write down the specification which then can be translated by tools into test case skeletons. The developers add the test code and write/enhance the application until the test passes. A big advantage is that stakeholders, customers, business analysts, requirement engineers, all parties of a project can provide tests.
BDD Key features
- Everyone can provide test cases
- Test cases are easy to read
- Good tool support for automation
- Developers need less domain knowledge
- Developers can focus on writing tests and features instead of finding test cases
- Project documentation on the fly
What about Test-Driven Development (TDD)?
Simply put, if software developers use the TDD technique, they first creates unit tests based on the requirements or the specification of the software or feature. Afterward, they enhance the software until the tests will eventually pass. This article on Medium explains TDD more in detail.
As you probably noticed, BDD and TDD can be combined. The main difference is that with TDD the developer creates the test cases and with BDD every person related to the project can supply tests with the common Gherkin syntax.
Gherkin syntax
The Gherkin syntax is a way to describe test cases and can be seen in the code example below. It consists of keywords at the beginning of each line followed by explaining text.
Feature: Login Ensures that access to internal areas is only provided for authenticated users
Scenario: Invalid login credentials prevent access to internal areas Given the user has opened the login page When the user enters invalid login credentials When the user clicks on the login button Then an error message is shown Then the user stays on the login page
Scenario: Valid login credentials allow access to internal areas Given the user has opened the login page When the user enters valid login credentials When the user clicks on the login button Then the user is redirected to an internal page
Feature describes a high-level software feature and is used to group scenarios. A Scenario is a test case for the feature. It consists of preconditions (Given), actions (When), and assertions (Then). There are many possibilities to provide more detailed information but the basic set of a feature file looks like this in Gherkin syntax.
To make it more natural, identical keywords can be chained by and. So instead of
Given ... Given ... Given ...
you can write
Given ... And ... And ...
Feels like talking, doesn’t it? 😊
From Text to Code
Ok, we have our text file in Gherkin syntax. To create test case skeletons we need an extension for Visual Studio called SpecFlow. It’s an open-source project to enable BDD in .NET environments and will save you a lot of typing. The extension is available for Visual Studio and Rider. The following guide uses the Visual Studio extension.
You can install the extension from the Visual Studio Marketplace (or follow this video guide for further assistance).
SpecFlow works with a .feature file (a simple text file with the ending .feature) that contains the Gherkin text and a binding file (a C# code file) that contains the actual C# test code. Every line in the feature file is mapped to a call of a method in the C# file. Based on the example feature file above, our C# file should have 7 methods (some lines are identical and share the same code).
To generate the binding file add the feature file to your project (or write it from scratch), open it, right-click in the editor and choose Define Steps. This command will create the file for you.
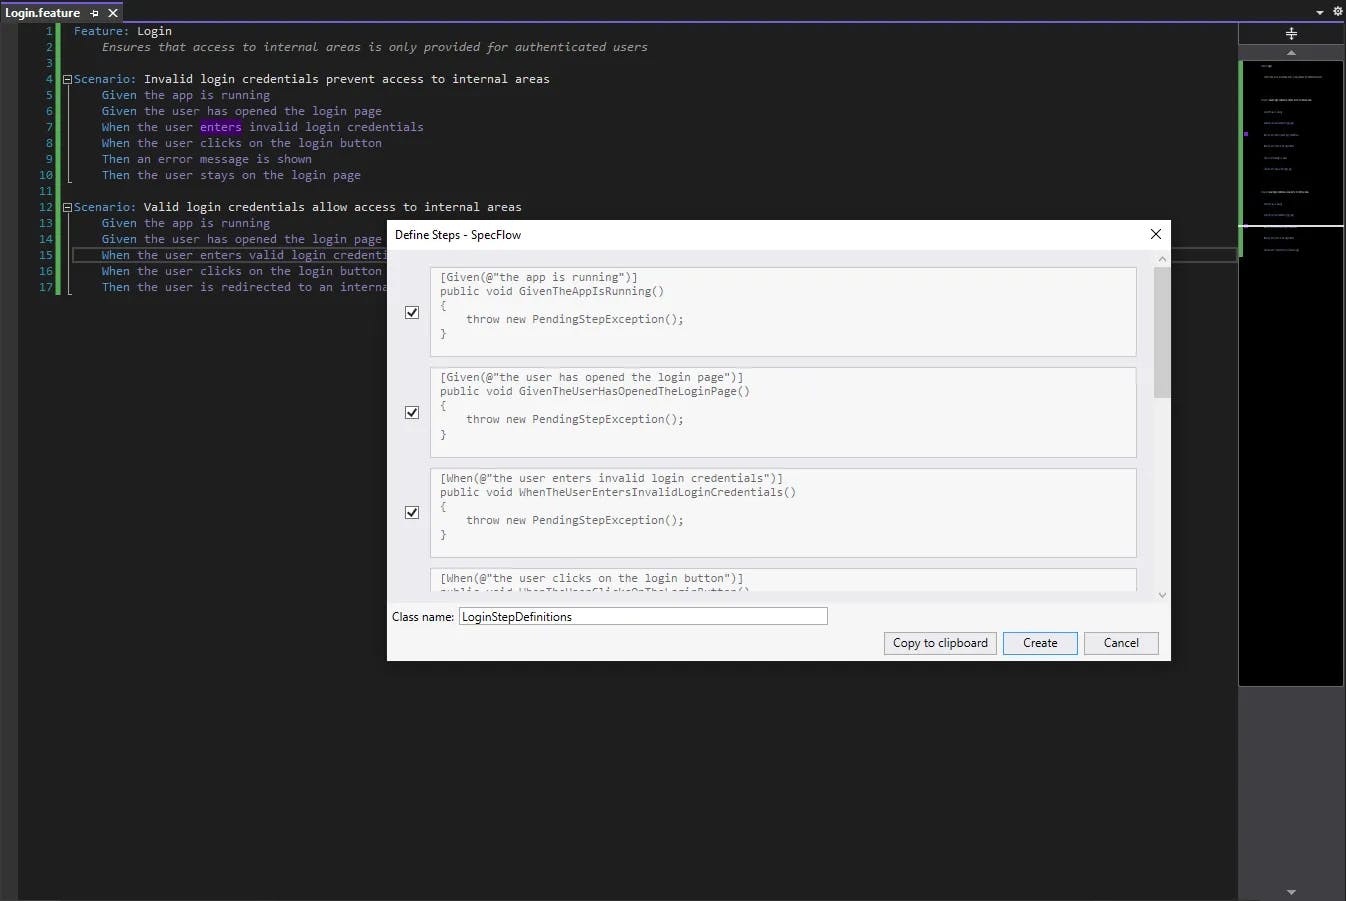
Generating step definitions for a feature file
It is good practice to have one binding file per feature file. If you add tests later, then the Copy to clipboard button is your friend which will allow you to insert the bindings into an existing file.
Writing the tests
The binding file contains methods without a body (or just a placeholder). The task is now to fill the body with a reasonable test code.
A Given method is supposed to prepare data like setting up a database or starting a service. A When method should perform user or system actions like clicking a button or writing text in fields. A Then method finally ensures that the outcome of the action combined with the preconditions fulfills the expected behavior. See the code example below for inspiration.
[Binding]
public class LoginStepDefinitions
{
    private readonly MyApp _app = new MyApp();
    private Exception? _exception;

    [Given(@"the user has opened the login page")]
    public void GivenTheUserHasOpenedTheLoginPage()
    {
        _app.NavigationService.GoToLoginPage();
    }

    [When(@"the user enters invalid login credentials")]
    public void WhenTheUserEntersInvalidLoginCredentials()
    {
        _app.LoginService.EnterCredentials("nope", "nope");
    }

    [When(@"the user clicks on the login button")]
    public void WhenTheUserClicksOnTheLoginButton()
    {
        try
        {
            _app.LoginService.Login();
            _app.NavigationService.GoToInternalPage();
        }
        catch (Exception ex)
        {
            _exception = ex;
        }
    }

    [Then(@"an error message is shown")]
    public void ThenAnErrorMessageIsShown()
    {
        Assert.IsNotNull(_exception);
    }

    [Then(@"the user stays on the login page")]
    public void ThenTheUserStaysOnTheLoginPage()
    {
        Assert.IsTrue(_app.NavigationService.IsOnLoginPage);
    }

    [When(@"the user enters valid login credentials")]
    public void WhenTheUserEntersValidLoginCredentials()
    {
        _app.LoginService.EnterCredentials("admin", "pass");
    }

    [Then(@"the user is redirected to an internal page")]
    public void ThenTheUserIsRedirectedToAnInternalPage()
    {
        Assert.IsTrue(_app.NavigationService.IsOnInternalPage);
    }
}
Executing the tests
Build your project and then the test runner should find the new tests and be able to execute them. For every feature file, there will be an auto-generated code file after the build.
The tests won’t run at first, they require some Nuget packages to be installed depending on your testing framework (see images below).
- SpecFlow is always required in your test project
- SpecFlow.NUnit is required if you are using NUnit to write your tests
- SpecFlow.xUnit is required if you are using xUnit to write your tests
- SpecFlow.MsTest is required if you are using MsTest to write your tests
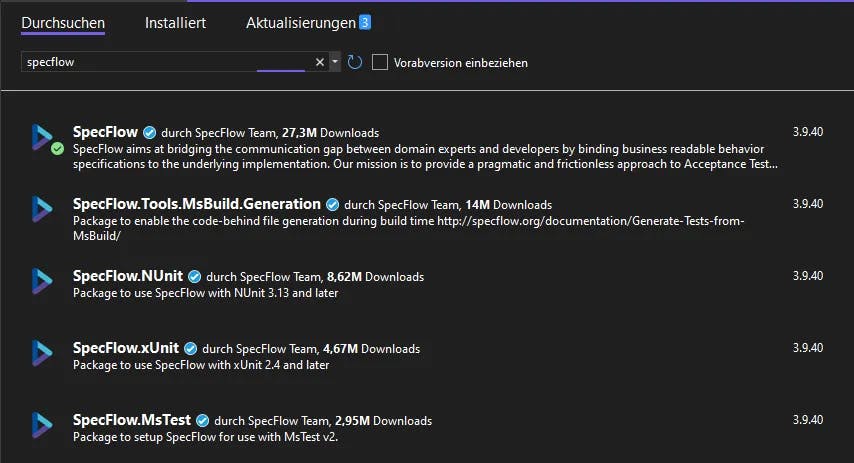
Install required Nuget packages for SpecFlow
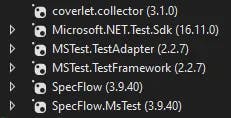
Installed packages when using MsTest framework
In case of failures, there is detailed information in the Test Explorer at what step the test failed. To enhance debugging it is even possible to put breakpoints in feature files.
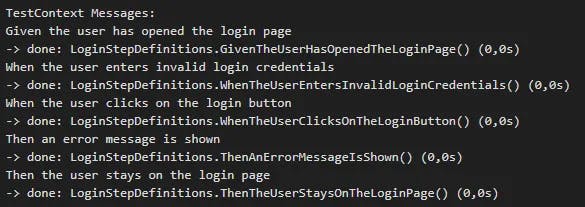
Logging of executed steps in Test Explorer output
Quick summary
- Install SpecFlow extension for your IDE (Visual Studio, Rider)
- Install SpecFlow Nuget packages in your test project
- Create a feature file and write your tests in Gherkin syntax
- Create the step definitions
- Implement the test methods
- Run the tests
Source code
You can find the source code on GitHub.